Over the last few months, I've practically buried myself in new jewelry without posting any of it, but now I'm finally starting to dig myself out. Here is the first batch of new items to go up in the shop! If you happen to see something that you like, just click the picture to go directly to the listing for that item! How convenient, right?
Pages
Welcome!
This blog is now exclusively devoted to crafting in general, and the shop in particular! Pretty much all of my personal content has been moved to a new blog, one that is intended primarily to help keep our family and friends in the loop. (If you are interested in following the new blog, you will find it here.) This blog will continue to feature shop news, new listings, sales, giveaways, and all of my share-worthy crafting exploits.
Tuesday, April 30, 2013
Sunday, April 28, 2013
Robin's Aprons
Now that she's married, Robin has been doing a bit more cooking. And, now that she's doing more cooking, it occurred to her that an apron or two might come in handy. This is where I come in. She asked me to make two aprons (one to wear and one to wash) in greens and purples. I already had the Emmeline Apron pattern in my stash and she liked it, so that's what we went with.
All of the fabrics for this one came from JoAnn's, except for the green trim on side one, which came from my stash. (I still have a ton of that green, and I really love that combination...I may need to do something else with it in the future...)
This time, everything is from JoAnn's except for the main fabric on the green side. As you can see, the belt can be tied in the back, or wrapped around to the front. The top straps can be tied around the neck as a halter, or crisscrossed over the back and tied to the belt. I added a pocket to both sides of both aprons, as requested.
Unfortunately, almost immediately after finishing these and moving on to my next project, I started having issues with the tension on my machine. The bottom thread is so tight, and the top is so loose, that I can just slide the bottom thread right out. I
have no idea how it got that way, or how to fix it. I tried adjusting
the tension both on the top and the bottom, with no discernible change. Someone at work recommended that I try oiling the machine; I'll give that a try tomorrow, and hopefully I'll be back in business!!
Monday, April 1, 2013
2013 St. Augustine Celtic Music and Heritage Festival
While I was in Florida, I went with my Mom and sister to the Celtic Music and Heritage Festival in St. Augustine. The night before, I was lucky enough to be able to meet up with Corinnea and Jess of Created Blissfully--yay!! This was the first time I'd seen Corinnea since she left Germany (a few months before we did), and only the second time that I'd seen Jess in person. It was just so nice to be able to catch up!
That was on Friday. We stayed that night in a hotel within walking distance of the festival, then got up and headed over to the fair grounds in time for the official kick-off parade. Some of the stuff at the festival was hand-made, but most of it was not. There was, however, an area set aside for the artisans. One of these artisans not only offered fused glass plates and baubles, but had a station set up where people could make their own fused glass pendants!
I didn't take any other pictures of all of the lovely hand made treasures. I think I had gotten tired of the camera for a little while. Now I wish that I had. There were lovely hand-carved wooden boxes and hand-thrown and painted urns and vases and blown glass and I don't even remember what else. In my defense, though, I did take about a billion other pictures that day. If you're interested in seeing my full post from that day, you can find it on my family blog.
Friday, March 29, 2013
Robin's Handmade Wedding
I got to help our friend Robin plan her wedding, which incorporated as much handmade and DIY as possible. The venue was a converted farm, so everything was very country-kitsch. These re-purposed pallets were painted with black chalkboard paint for use as directional signs. The lettering was done with chalk pens.
Another friend of hers makes beer, and so made them a custom brew for the wedding.
Instead of a traditional guest book, Robin elected to do a signature quilt and a thumbprint tree. She and I went together to pick out her fabrics, then I cut all the squares and brought them to the wedding for the guests to sign. When she gets done reading them all, she'll send them back to me and I'll get it all put together. (More on that later.) For the signature tree, yet another friend of hers drew a picture of "their" tree in Michigan, where Matt proposed.

Our friend Sam, who also did the flowers for her wedding last summer, made the burlap roses using this tutorial over the winter. Then they ordered fresh flowers from a local wholesaler. Sam did all of the flower arrangements the Friday and Saturday before the wedding.

Robin and a few of her bridesmaids made the bouquets.
Another friend of hers makes beer, and so made them a custom brew for the wedding.
Instead of a traditional guest book, Robin elected to do a signature quilt and a thumbprint tree. She and I went together to pick out her fabrics, then I cut all the squares and brought them to the wedding for the guests to sign. When she gets done reading them all, she'll send them back to me and I'll get it all put together. (More on that later.) For the signature tree, yet another friend of hers drew a picture of "their" tree in Michigan, where Matt proposed.

Our friend Sam, who also did the flowers for her wedding last summer, made the burlap roses using this tutorial over the winter. Then they ordered fresh flowers from a local wholesaler. Sam did all of the flower arrangements the Friday and Saturday before the wedding.

Robin and a few of her bridesmaids made the bouquets.
And of course, I did the jewelry.
As always, I had a lot of fun designing the jewelry with the bride. I know I've said it before, but I love working with someone on a custom piece. Sadly, the photographer hasn't finished with her official wedding photos, so we'll have to make do with the ones that I took.
But you get the idea.
The wedding itself was lovely, if a little cold.
I was honored to be able to be such a big part of it all.
Congratulations, Matt and Robin! Here's to a lifetime of happiness for you both!
Tuesday, March 26, 2013
T-Shirt Series: Sword Tattoo and Remyngton Rifle
Choosing a design for my brother in law was easy. He did a lot of drawing in high school, and was really quite gifted. (I'm sure he still is, but he hasn't drawn anything to speak of in ages.) One of his more elaborate drawings featured a girl with a simple sword tattoo on her arm.
My husband liked it enough that he later had the design tattooed on his own arm, and James decided that he would someday get it tattooed on his forearm. That hasn't happened yet, but in the meantime, I thought that a t-shirt would be perfect.
And it was. Brandon used Paint to put it together, then traced it directly from his computer screen, as he did for the Proto Man shirt. He did the ironing and spraying, I did the dabbing.
Our friend Jeremy is into guns. Like, really into guns. Naturally, his shirt must have something to do with guns. We toyed around with a few different ideas, until it occurred to Brandon to combine Jeremy's nickname, Remy, with Remington, the firearms manufacturer. Add in a bit of Photoshop magic, compliments of yours truly, and
became
Genius, right? We took the modified logo and put it inside the silhouette of a Remington ACR, which Brandon traced from his screen.
Here's the finished product:
Again, Brandon did the ironing, and again, the details came out perfectly. I don't have a picture of him in it, yet, but I'll post it when I do!
Saturday, March 23, 2013
T-Shirt Series: Wonder Woman and Protoman
My t-shirt series continues with the Wonder Woman shirt that I did for our friend Sam. She linked this t-shirt to me shortly before we decided to make t-shirts for everyone, and it made choosing her design easy. The design itself...not so much. I found the basic Wonder Woman design online, added the text to it in Photoshop, printed it, and later drew the shadows in by hand.
![]() |
| Here's my basic pattern, if you're interested in using it. Click the image to view full-size, then save it and print it . |
I am absolutely thrilled with the way it turned out!! Here it is, side-by-side with the original:
And here it is, modeled by Sam:
Edit: Sam just told me that after washing it once, her t-shirt is nearly threadbare. I chose that shirt because it was so soft, but apparently they did too good a job of distressing the fabric. So, a word to the wise: don't get the "well worn" (that's what it says on the tag) t-shirts from Target. Or, if you do, make sure to hand wash it. It looks like I'll be making another Wonder Woman shirt...
For her husband, Tony, Brandon chose a Proto Man design. Because he wanted the image to be larger than 8.5x11, he traced it onto the freezer paper directly from his computer screen rather than printing it as I'd been doing. I'm still not sure how he accomplished it so perfectly, but he did. Here's the inspiration picture, with his finished design:
He did pretty much everything for this one; my only contribution was to dab the shirt with a paper towel to soak up the excess moisture during the bleaching process. He seems to have the magic touch when it comes to ironing the pieces on. The entire thing came out crisp, with no bleeding or loss of detail.
Pretty darned impressive, I'd say.
A special thanks to Sam and Tony for modeling the shirts for me, and letting me snap away with the camera, even though I'm pretty sure you both would have preferred to skip the exercise entirely. :)
Wednesday, March 20, 2013
T-Shirt Series: MAtNAr and BLU
We made a number of t-shirts using freezer paper and bleach (or paint) for our family and friends for Christmas this past year, but the majority of them were not delivered until about 2 weeks ago. My dad's Star Trek shirt was one of the first ones we did, but it was the only one that got posted. Now I finally get to post the rest!
I'm going to start with Matt's, even though it was one of the last ones we did, because I actually took a few pictures of the process for that one. Matt is currently working on a PhD in chemistry (yes, chemistry) so of course his had to be chemistry-related. Brandon's first idea was to spell his nickname, Matnar, using elements from the periodic table, but there is no "M" or "Ma" so we scrapped the idea and spent months trying to come up with something else. In the end, we came back to that first idea, and just made up our own element for the "M". I made the design in Photoshop, printed it, and traced it. Brandon then cut it out, leaving all of the tiny pieces attached at the corners. Normally, he would have detached them just before ironing them on, but this time he left them together as an experiment. He put a piece of cardboard inside the shirt, then ironed the whole thing down together, and used tweezers and the x-acto knife to pull off the necessary pieces.
Once finished, he ironed it all again, just to be sure. You have to be careful with it, because if you don't iron it enough, the bleach will bleed under the stencil. But, if you iron it too much, then it can be hard to get all of the paper pulled off when you're done. Brandon has had more luck with it than I have, but we're still not sure about how to get it exactly right every time.
As you can see, we used emptied boxes from the pantry as cardboard shields to protect the rest of the shirt, and taped it all together with masking tape. The bleach solution is just a 50/50 mix of bleach and water in a little spray bottle. (We had the most success with one of the little ones from the travel supply section at Target.) I didn't take and pictures of the actual bleaching process, because we did that step together. Usually, he would mist the bleach solution over the stencil, and I would dab at it with a paper towel to soak up the excess. Sometimes, we used the iron to speed the process, but it can cause it to look a bit uneven. When we're satisfied with how it looks, we pull off all of the cardboard and submerge the shirt in cold water to stop the bleaching process. Then, and only then, do we get to pull off the stencil and see how the shirt looks.
Matt's shirt is the only one that Brandon did that bled, but it wasn't too bad. We considered trying to add to it, butran out of time decided that it might be best to just leave it as it is.
He liked it so much that he wore it on his honeymoon last week. (Thanks for the picture, Robin!)
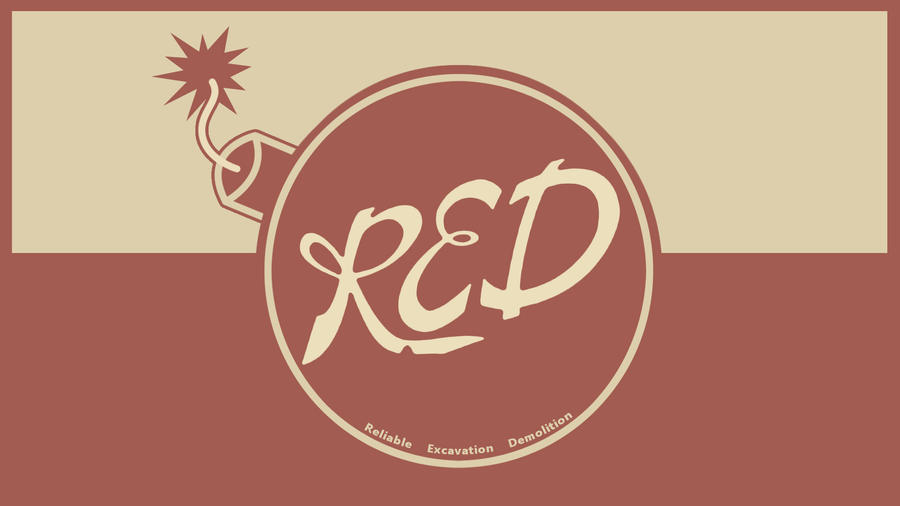
John's shirt, on the other hand, turned out perfectly. They all play video games together, so Brandon chose a design from the game Team Fortress 2. The players are all split into two teams, the RED and the BLU, and then they run around trying to kill each other, among other things. I played with both in Photoshop, but went with the BLU logo, because it was less complicated than the logo for the RED team.
We used the same process for this one, except that we cut the stencil completely apart before ironing it onto the shirt. The result was much more crisp.
Win.
I'm going to start with Matt's, even though it was one of the last ones we did, because I actually took a few pictures of the process for that one. Matt is currently working on a PhD in chemistry (yes, chemistry) so of course his had to be chemistry-related. Brandon's first idea was to spell his nickname, Matnar, using elements from the periodic table, but there is no "M" or "Ma" so we scrapped the idea and spent months trying to come up with something else. In the end, we came back to that first idea, and just made up our own element for the "M". I made the design in Photoshop, printed it, and traced it. Brandon then cut it out, leaving all of the tiny pieces attached at the corners. Normally, he would have detached them just before ironing them on, but this time he left them together as an experiment. He put a piece of cardboard inside the shirt, then ironed the whole thing down together, and used tweezers and the x-acto knife to pull off the necessary pieces.
Once finished, he ironed it all again, just to be sure. You have to be careful with it, because if you don't iron it enough, the bleach will bleed under the stencil. But, if you iron it too much, then it can be hard to get all of the paper pulled off when you're done. Brandon has had more luck with it than I have, but we're still not sure about how to get it exactly right every time.
As you can see, we used emptied boxes from the pantry as cardboard shields to protect the rest of the shirt, and taped it all together with masking tape. The bleach solution is just a 50/50 mix of bleach and water in a little spray bottle. (We had the most success with one of the little ones from the travel supply section at Target.) I didn't take and pictures of the actual bleaching process, because we did that step together. Usually, he would mist the bleach solution over the stencil, and I would dab at it with a paper towel to soak up the excess. Sometimes, we used the iron to speed the process, but it can cause it to look a bit uneven. When we're satisfied with how it looks, we pull off all of the cardboard and submerge the shirt in cold water to stop the bleaching process. Then, and only then, do we get to pull off the stencil and see how the shirt looks.
Matt's shirt is the only one that Brandon did that bled, but it wasn't too bad. We considered trying to add to it, but
He liked it so much that he wore it on his honeymoon last week. (Thanks for the picture, Robin!)
John's shirt, on the other hand, turned out perfectly. They all play video games together, so Brandon chose a design from the game Team Fortress 2. The players are all split into two teams, the RED and the BLU, and then they run around trying to kill each other, among other things. I played with both in Photoshop, but went with the BLU logo, because it was less complicated than the logo for the RED team.
We used the same process for this one, except that we cut the stencil completely apart before ironing it onto the shirt. The result was much more crisp.
Win.
More from the series on Saturday!
July 16 Edit: as requested by Clint in the comments, here is the stencil I used for the Blu logo. The lines aren't remotely perfect, but I corrected it when I was tracing the stencil. The globe is the worst. Rather than trying to trace that mess, I simply drew in those lines by hand.
Subscribe to:
Posts (Atom)


.jpg)


.jpg)