
In spite of what my recent lack of posting may have led you to believe, I have been crafting over the last few months. I just haven't been photographing any of it. Or, as was the case with this project, I just couldn't post it until it had reached its many intended recipients. :)
Thanks to a referral from my friend Rebekah, I had the honor of making the invitations for her sister-in-law's upcoming wedding. I worked closely with Kayla to design both the invitations and RSVP cards, to create something perfectly tailored to her style and colors. She's a very classy, rather traditional kind of lady, and I think what we put together reflects that well. We started with a mock-up that I put together in Photoshop using my digital scrapbooking elements.
Thanks to a referral from my friend Rebekah, I had the honor of making the invitations for her sister-in-law's upcoming wedding. I worked closely with Kayla to design both the invitations and RSVP cards, to create something perfectly tailored to her style and colors. She's a very classy, rather traditional kind of lady, and I think what we put together reflects that well. We started with a mock-up that I put together in Photoshop using my digital scrapbooking elements.

Then I had to track down all the supplies I would need to make the digital mock-up a reality. It actually took quite a bit of searching to find everything. It all had to be just the right color, without being too expensive. And once I had all the supplies, I had to figure out how best to assemble the invitations. I had a plan going it, of course, but as so often happens, my initial approach just wasn't practical. It took a bit of trial and error before I found a method that worked, and I actually think that this was the part I enjoyed the most. Unfortunately, I quickly realized that assembling the invitations was going to take a whole lot longer than I'd originally anticipated.
I'd initially planned to one piece of lace long enough to span the width of the invitation and wrap around to the back of the top piece of card stock, and two equal lengths of ribbon. I glued down the lace, secured the ends of the lace and the ends of the ribbon between the two layers of cardstock, and then tried to tie the the ribbon in a pretty bow on the front. I ran into a lot of problems with that approach. The glue didn't dry quickly enough for the ends to stay put if I tried to tie the bow right away, so I let the glue dry and tried again. This time, the ends stayed put, but I had a very hard time getting the tension on the ribbon just right, so that it would lay flush against the paper without flapping loose or being so tight that it bowed the paper. I also had trouble tying tying a bow that looked just so; they kept coming out twisted sideways and funky-looking.
I finally realized that I was approaching the whole process from the wrong side. Instead of starting with the papers and working up, I needed to start with the bow and work down. So, here's my process for making one layered, 8.5" x 5.5" wedding invitation:
You'll need:
1 8.25" x 5.25" cardstock invitation (the top layer)
1 8.5" x 5.5" cardstock mat (the bottom layer)
1 6.5" length of lace, approx 1.25" wide
2 lengths of 7/8" ribbon, one 9" and one 12"
sewing machine & coordinated thread
heavy book
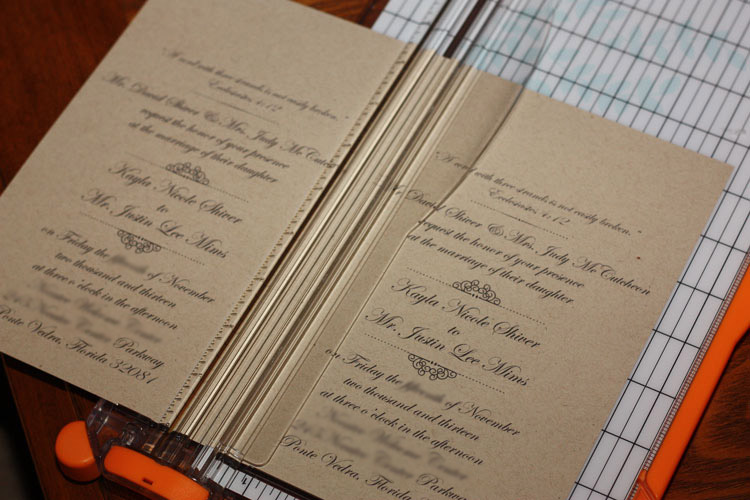
First, go ahead and cut your papers down to size. I used one of these to cut mine. The measuring grid was great for cutting the standard size card stock papers in half, but when it came to the 1/8" cuts I needed to make all the way around each of the invitations, I had a lot more success just eyeballing the measurement. Using the rulers on the tool always left me with crooked cuts.

Put a few drops of the Zip Dry glue along the top of the invitation, when the lace will go. Smooth it out with your finger tip, so that there are no large globs and so that the sticky part covers a greater surface area. Center the lace across the top of the page, and press. Set it aside to dry.

Take the 12" length of ribbon and cross the ends over the middle to create a general bow shape. Pin it, then baste vertically down the middle to hold it in place. Don't worry about back stitching, this is just to hold the bow shape together while you're working on the next step. (Since I was making a whole lot more than just a single invitation, I just did them in big long strings that I just cut apart later.)

Next, tie the 9" piece of ribbon around the bow shape. This will cinch down the center of the bow and cover up the stitches. It's pretty tricky to do, because you have to get it centered, so that you're left with 2 even tails, and you have to tighten it a little at a time to get the ribbon of the bow shape to cinch prettily rather than just folding back. Also, if you're using 2 sided ribbon, as I was, you'll need to make sure that the knot is on back side of the ribbon shape, so that when you flip it over, it looks like a normally tied bow with only the satiny side showing:

The glue holding the lace to your invitation should now be dry, and ready for the bow.

Put a pea-sized drop of the Aleene's glue smack dab in the center of the lace, and press the center of your bow into it. This is where you need the heavy book, since the bow will not stay put or lay flat unless you press it down into the glue and onto the paper as it dries. Very carefully position the book on top of the bow, keeping your finger pressed in the center of it until the last possible moment, so that it doesn't move on you. I'm not exactly sure how long this takes to dry, since I was working in batches or five or 6 invitations at a time. By the time I'd rotated through all the other batches in their various stages and come back to the ones at this stage, they'd be dry--or at least, dry enough to work with. But, if I had to guess, I'd say it needs about 15-20 minutes.

Remove the book, and flip the invitation over. Put one small drop of the Zip Dry glue about a quarter inch from each edge of the invitation, right behind the lace and ribbon. Wrap the tails of both the lace and the ribbon around to the back side, and press them into the glue. Hold them in place for 15-30 seconds, then quickly and carefully transfer the invitation, backside down, to a crafting mat and cover once more with the book. Sometimes, the glue will seep out from behind the lace and ribbon on this step, so be careful that you don't set it down on anything it might stick to. As you can see in the photo, I used my large cutting mat as a work space, and I had no problems. The times that it did stick to the mat, I only had to pull gently and perhaps twist the paper a bit to get it to come off. Nothing remained behind on my mat. This glue dries faster than the Aleene's, so it should be safe to work with again after only 5-10 minutes.
Once it's dry, and the ends are secure, remove the book. On the backside of the invitation, put a thin line of the Zip Dry about 1/4" from the edge along each of the 4 edges, including over the tail ends of the ribbon and lace. Center the invitation over the mat, making sure that the mat shows evenly on all sides, and press it down. You have to do this kind of quickly, because the glue will dry on you if you wait too long. It is possible to re-position it a bit after you put it down, just by sliding where it needs to go. (DON"T try to lift it up to move it.) When satisfied with the positioning, I put mine back under the book to dry, just to ensure that they thoroughly adhered.

This last step was always my favorite, because it was the last step, and when it was dry, it could go on the "finished" pile. And, since I made more than 100 of these beauties, putting one on the "finished" pile was a big deal. I was really, really pleased with the way that they turned out. I was a little amazed at how close the finished product was to the initial mock-up that we put together. I mean, I know that was the goal, but still. I have to admit that I was a bit nervous anyway, when I boxed them up and shipped them out at the end of July. I knew we had worked closely through everystep of the design process, and she approved every element that went into them, but still....what if? I think anyone who's ever crafted anything from someone else knows the feeling. You have to kind of wait with baited breath until the person gets to see what you've made, whether it's a gift, or a custom commission for a customer.
I shouldn't have worried. Kayla and her fiancee were thrilled with them. So thrilled, in fact, that they've asked me to make the wedding programs as well. :)

1 comment:
I could NEVER say thank you enough! Your work is impeccable & more than I could've ever dreamed of!! Almost all my guests personally contacted me to say it was "the most beautiful invitation they'd ever seen" You are such a joy to work with & I can always tell its done out of love & care! We so appreciate you!!! Xoxox Kayla
Post a Comment